> ## Documentation Index
> Fetch the complete documentation index at: https://docs.chaintable.com/llms.txt
> Use this file to discover all available pages before exploring further.
# Account management
> Understand personal accounts, Organizations, and Spaces, and manage account switching and team members.
Accounts own resources and API Keys; Spaces organize their tables, Functions, Notebooks, Queries, and Dashboards. Check the current account and Space before creating resources.
## Personal accounts and Organizations
A personal account manages your own resources. A team account is called an **Organization** in the UI and supports collaboration through member roles. A user can access their personal account and Organizations they have joined.
Click the avatar at the top right, select your personal account or an Organization, then open **Spaces** to choose a workspace.
Switching accounts changes which account you inspect for usage, manage API Keys for, and create resources under. Existing resources remain in their original Space.
## Manage Spaces
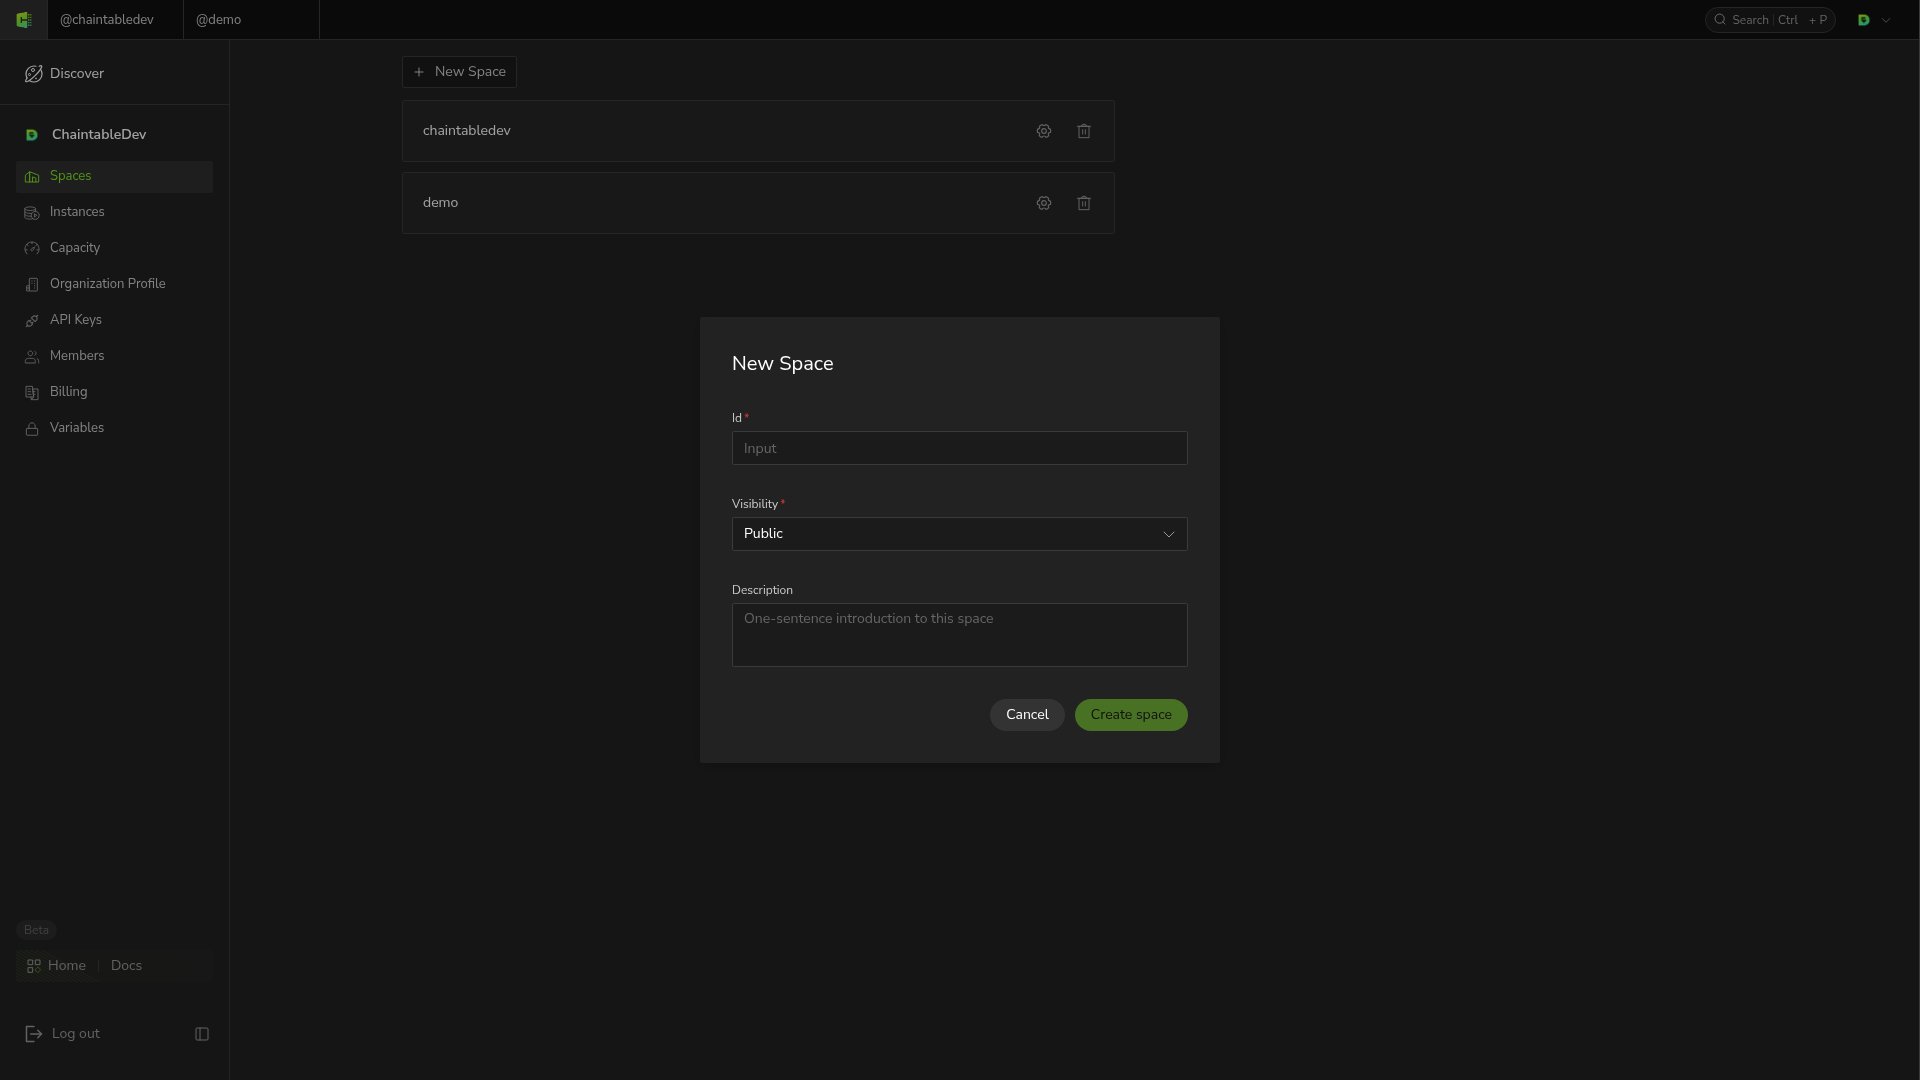
Open **Spaces** from the account menu to view workspaces. Click **New Space** and fill in:
| Field | Content |
| --------------- | ------------------------------------------------- |
| **Id** | Space ID used in full resource IDs |
| **Visibility** | Visibility; the current creation UI offers Public |
| **Description** | Workspace purpose |
Click **Create space**. Only Public is currently available, so do not treat resources stored here as private.
 ## Members and permissions
Switch to an Organization and open **Members** from the account menu. Organization roles have these permissions:
| Role | Permissions |
| ------ | ------------------------------------------------------------ |
| Owner | Organization owner |
| Admin | Manage Organization information, members, and other settings |
| Member | Create Spaces and edit resources |
## Members and permissions
Switch to an Organization and open **Members** from the account menu. Organization roles have these permissions:
| Role | Permissions |
| ------ | ------------------------------------------------------------ |
| Owner | Organization owner |
| Admin | Manage Organization information, members, and other settings |
| Member | Create Spaces and edit resources |
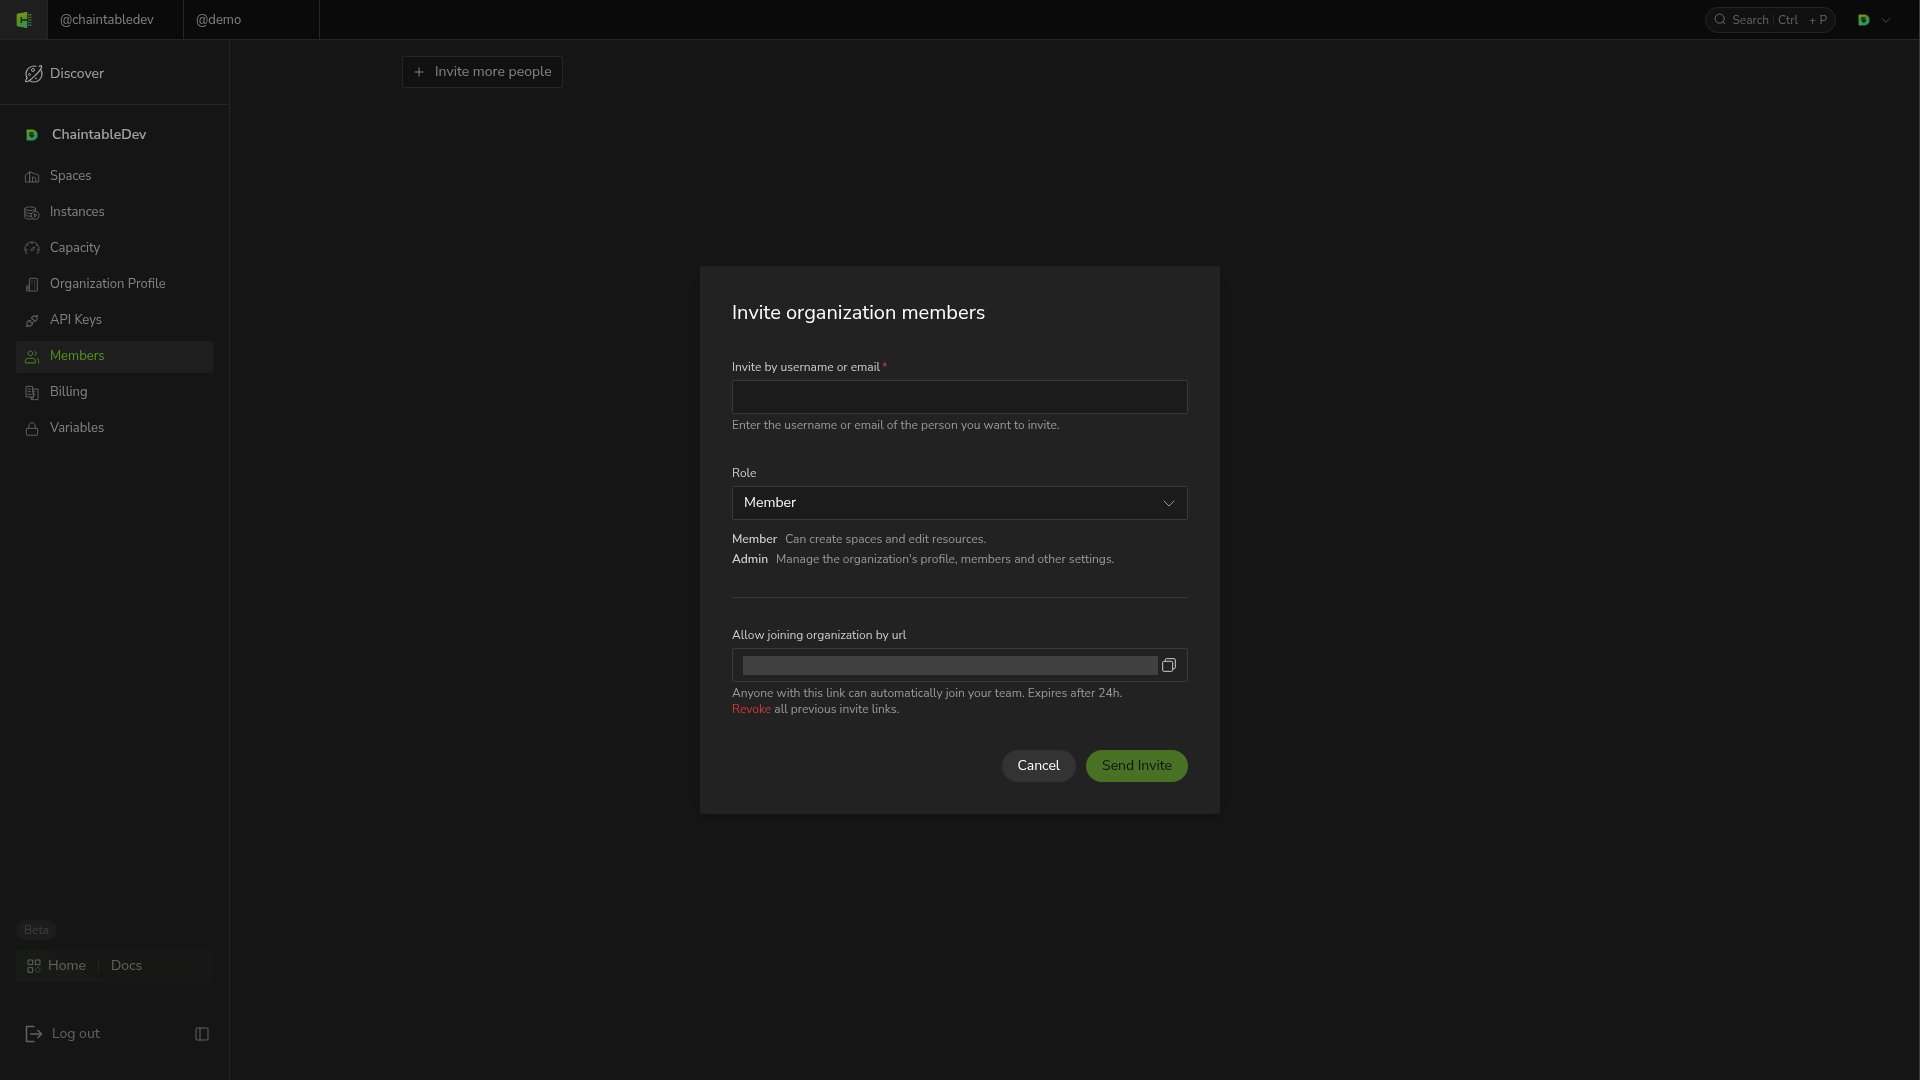 If you have invitation permissions, click **Invite more people**, enter a username or email address, choose an available **Role**, and click **Send invite**. If an invitation link is enabled, anyone holding it can join. The UI states that the link expires after 24 hours. Share it only with intended team members.
Use the member list to change a member's role or remove them.
If you have invitation permissions, click **Invite more people**, enter a username or email address, choose an available **Role**, and click **Send invite**. If an invitation link is enabled, anyone holding it can join. The UI states that the link expires after 24 hours. Share it only with intended team members.
Use the member list to change a member's role or remove them.