> ## Documentation Index
> Fetch the complete documentation index at: https://docs.chaintable.com/llms.txt
> Use this file to discover all available pages before exploring further.
# Schedule
> Schedule Notebook runs at fixed times or continuously, and manage execution settings and status.
Schedules automatically run saved Notebook code according to their configuration.
## Create a timed schedule
1. Open the Notebook's Space, select **Schedules** in the sidebar, and click **+** in the upper right.
2. Search for and select the script under **Notebook**.
3. Fill in **Parameters** and select **Spec**.
4. Select **Crontab - Run on a fixed schedule** under **Mode**, then set the frequency and time.
5. Optionally describe its purpose in **Remark**, then click **Create**.
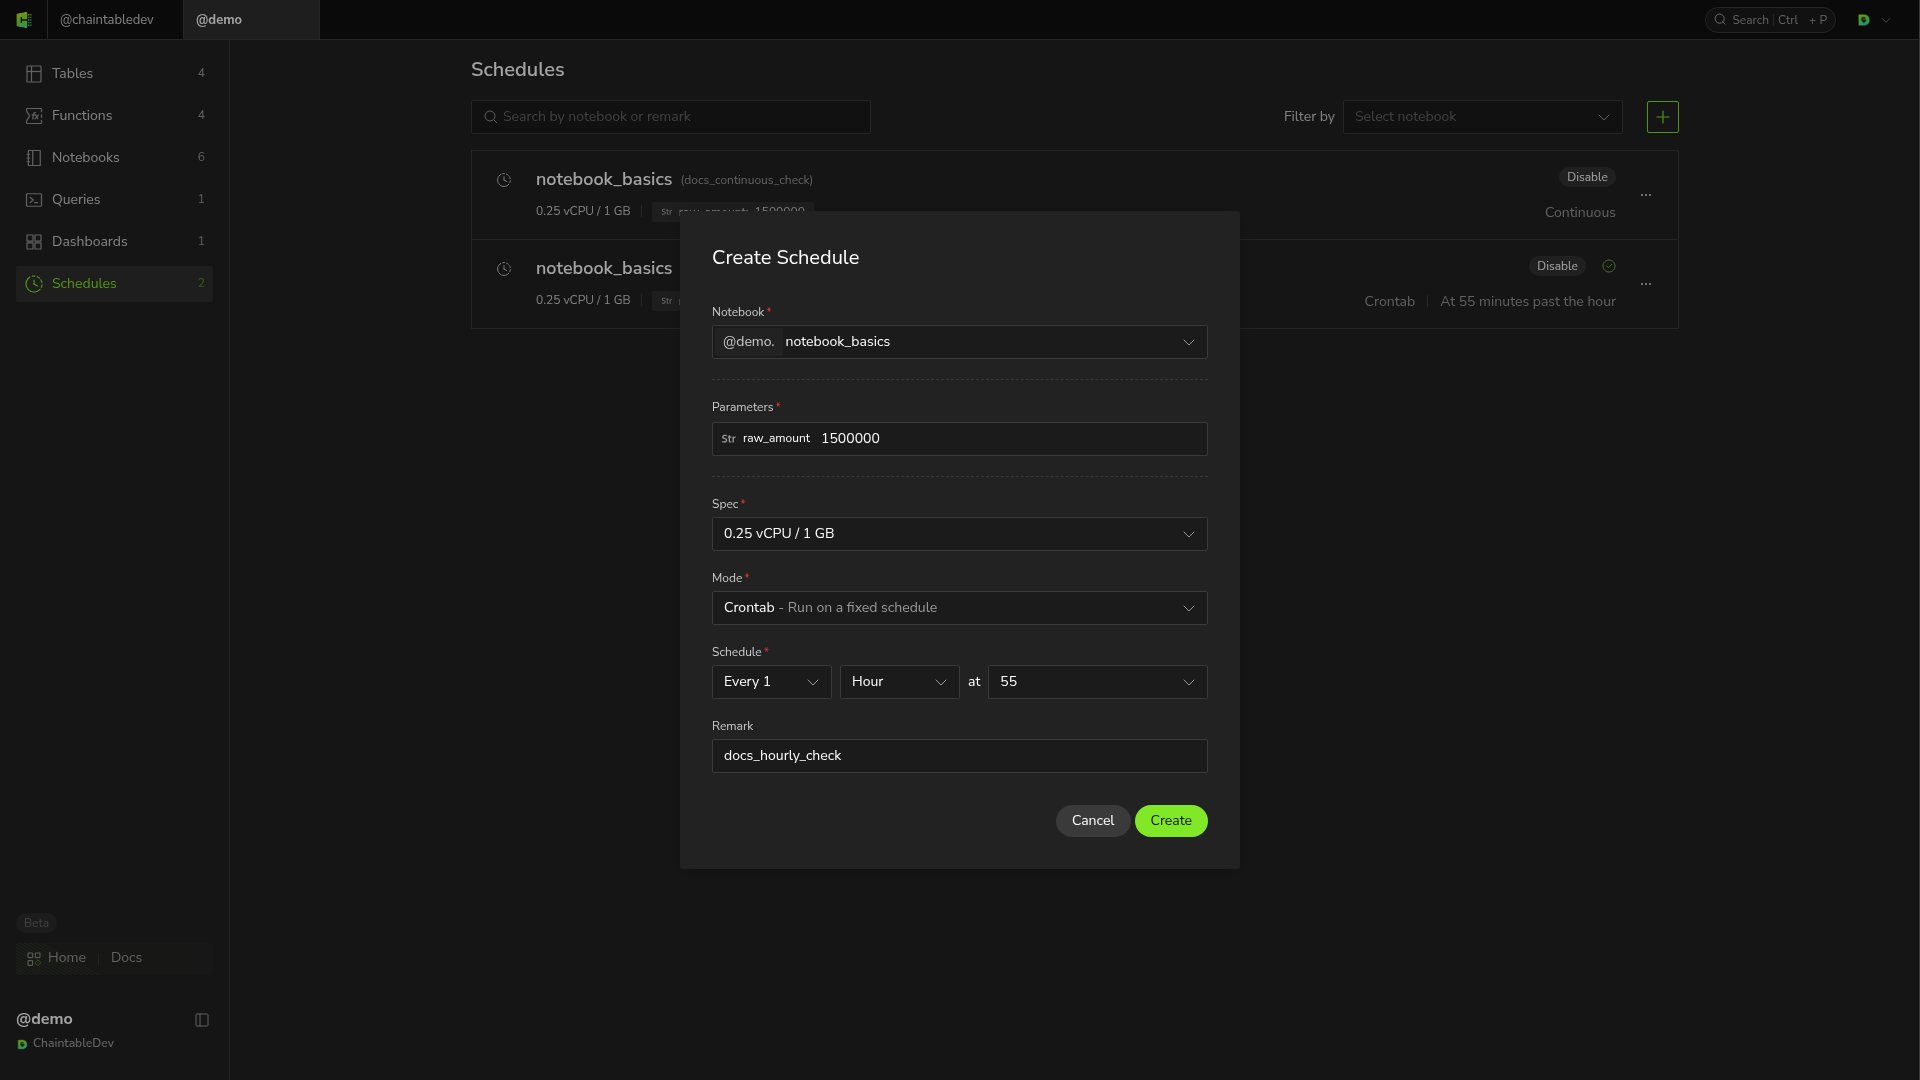 The list shows the Notebook, remark, parameters, resource spec, and scheduled time.
A scheduled run may be skipped if the previous instance is still running.
## Create a continuous schedule
For `Pipeline.update()` or a long-running subscription, select **Continuous - Keep running continuously** under **Mode**, set parameters and resources, and click **Create**.
The list shows the Notebook, remark, parameters, resource spec, and scheduled time.
A scheduled run may be skipped if the previous instance is still running.
## Create a continuous schedule
For `Pipeline.update()` or a long-running subscription, select **Continuous - Keep running continuously** under **Mode**, set parameters and resources, and click **Create**.
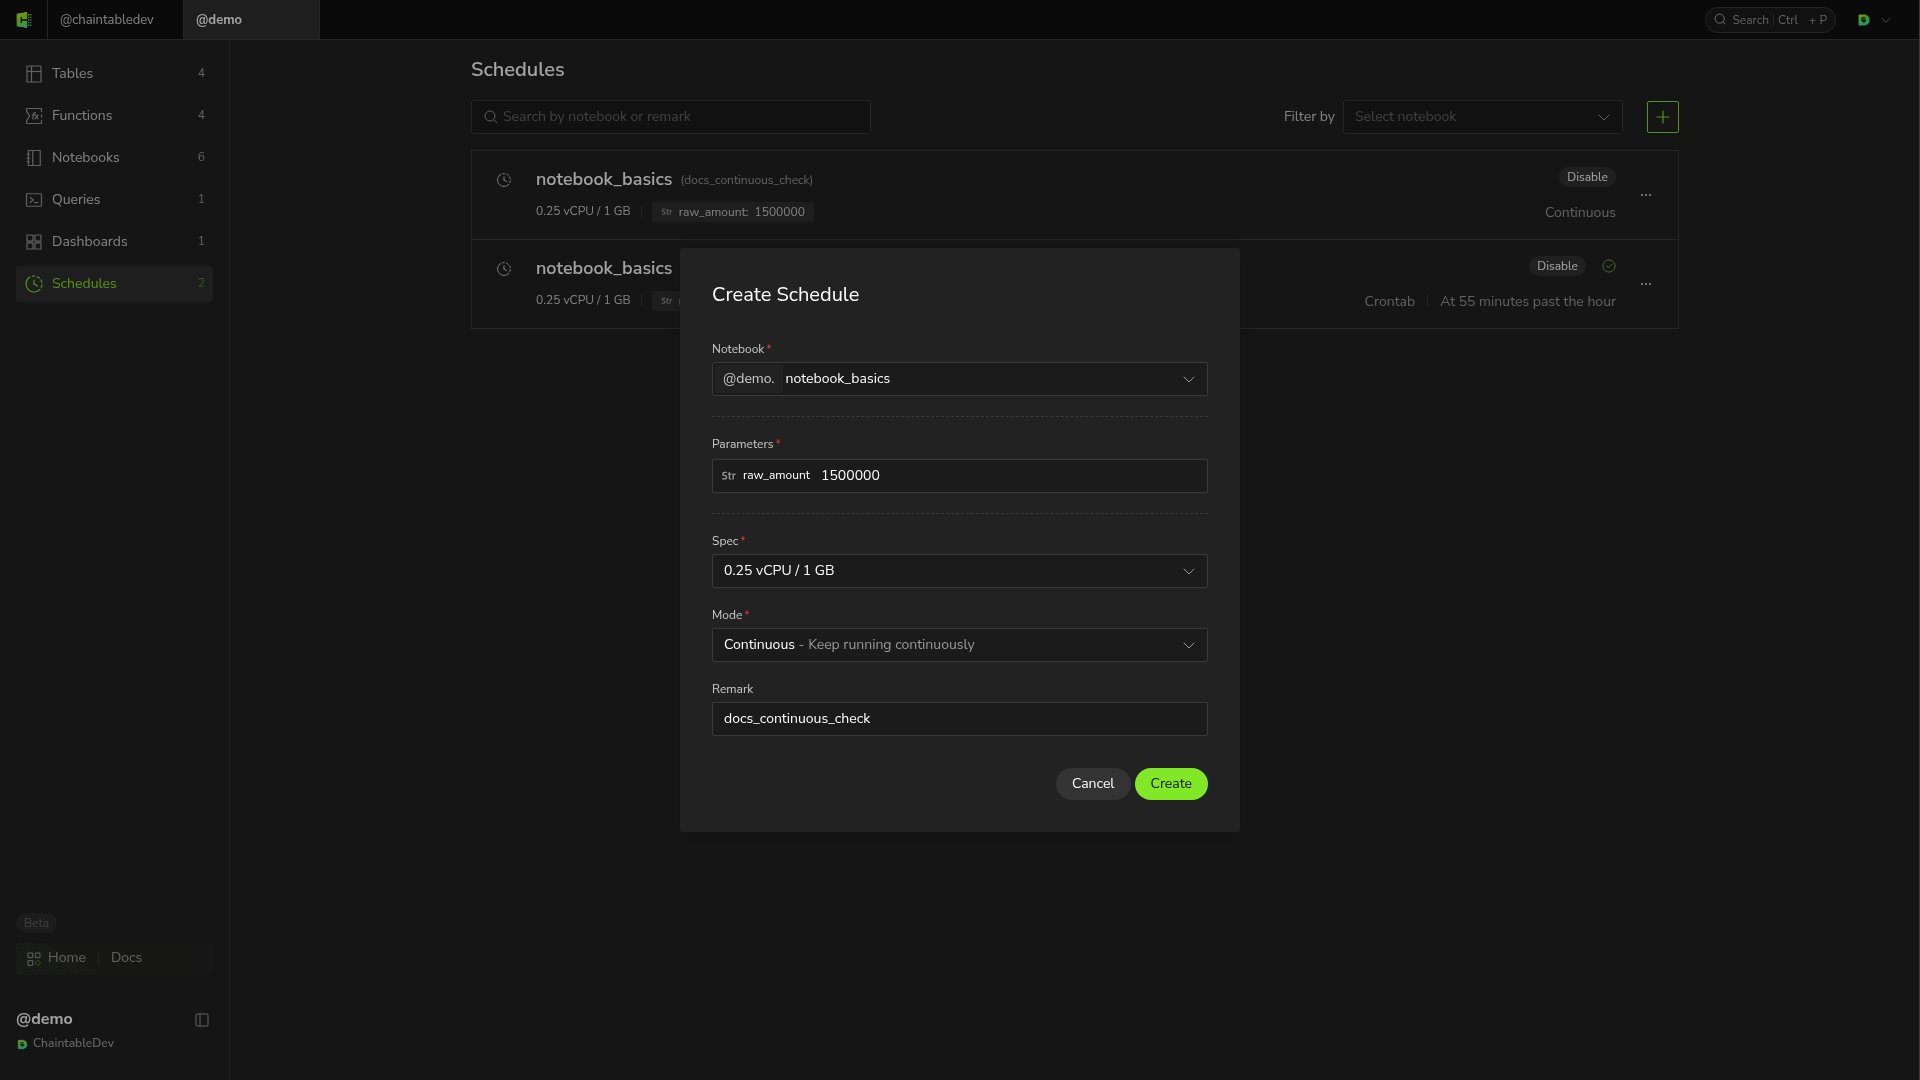 Continuous keeps an instance running. When enabled, the system starts the script and starts it again after the instance exits.
Finite scripts are also restarted after normal exit. Use Crontab for work that should run once at each scheduled time and then stop.
## Check results
1. Check the configuration and enabled status in **Schedules**.
2. Open **Instances** from the account menu and find the Notebook's instance at the relevant time.
3. Open the instance, check the schedule name under **Launched**, **Arguments**, and **Start Time**, then inspect **Status** and **Logs**.
Continuous keeps an instance running. When enabled, the system starts the script and starts it again after the instance exits.
Finite scripts are also restarted after normal exit. Use Crontab for work that should run once at each scheduled time and then stop.
## Check results
1. Check the configuration and enabled status in **Schedules**.
2. Open **Instances** from the account menu and find the Notebook's instance at the relevant time.
3. Open the instance, check the schedule name under **Launched**, **Arguments**, and **Start Time**, then inspect **Status** and **Logs**.
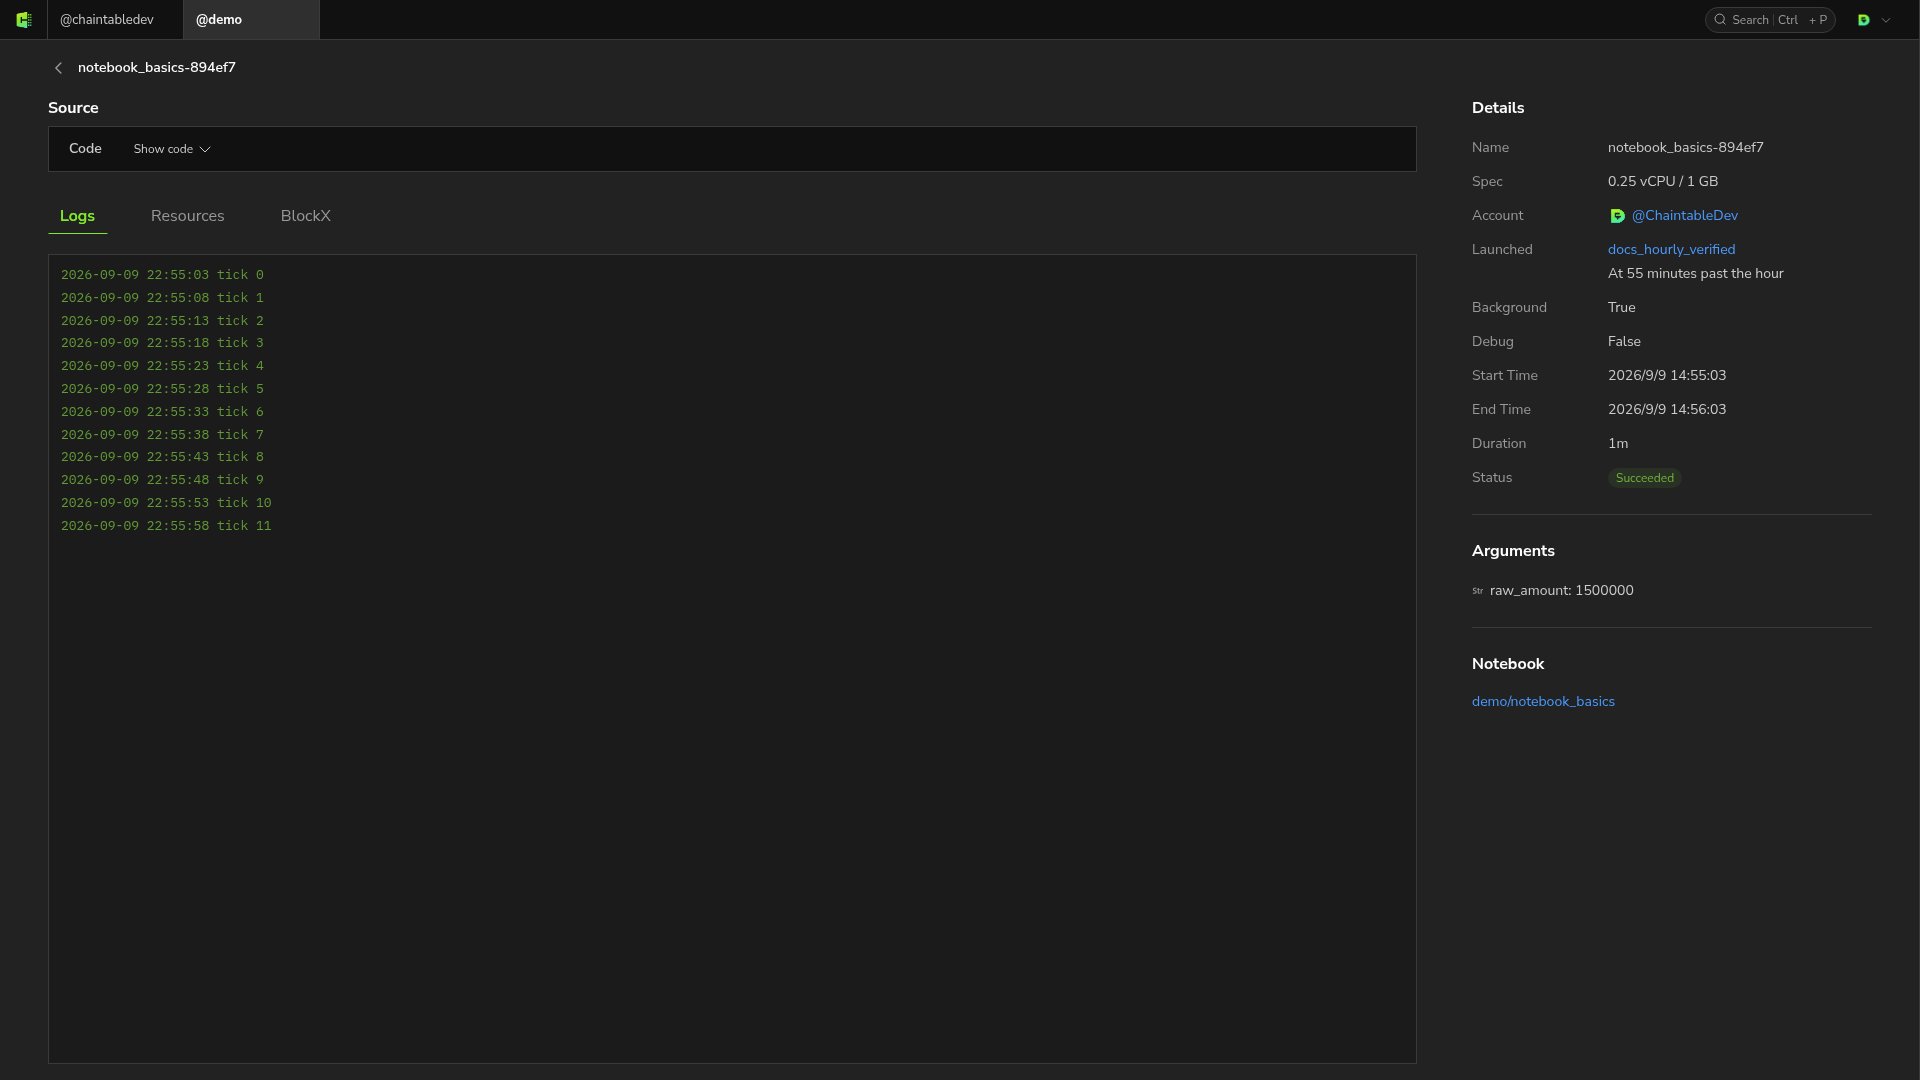 The timed instance shown above exited normally and retains the test script's output from `tick 0` through `tick 11`. Use the same steps to inspect logs from ended Continuous instances.
## Edit and stop
Open **…** at the right of a schedule row:
| Action | Effect |
| ----------- | ------------------------------------------------------------------------- |
| **Disable** | Stops future timed triggers; for Continuous, also stops its instance |
| **Enable** | Enables the schedule again |
| **Edit** | Change parameters, resources, time rules, or remarks, then click **Save** |
| **Delete** | Removes the schedule configuration |
To update a running Continuous schedule, **Disable** it and confirm the instance ends, save the code and configuration, then **Enable** it so the new instance uses the changes. Disabling Crontab does not cancel an instance that has already started; use **Cancel** in instance details if needed.
The timed instance shown above exited normally and retains the test script's output from `tick 0` through `tick 11`. Use the same steps to inspect logs from ended Continuous instances.
## Edit and stop
Open **…** at the right of a schedule row:
| Action | Effect |
| ----------- | ------------------------------------------------------------------------- |
| **Disable** | Stops future timed triggers; for Continuous, also stops its instance |
| **Enable** | Enables the schedule again |
| **Edit** | Change parameters, resources, time rules, or remarks, then click **Save** |
| **Delete** | Removes the schedule configuration |
To update a running Continuous schedule, **Disable** it and confirm the instance ends, save the code and configuration, then **Enable** it so the new instance uses the changes. Disabling Crontab does not cancel an instance that has already started; use **Cancel** in instance details if needed.