> ## Documentation Index
> Fetch the complete documentation index at: https://docs.chaintable.com/llms.txt
> Use this file to discover all available pages before exploring further.
# Create and manage tables
> Choose a table type, define fields and indexes, and manage table configuration.
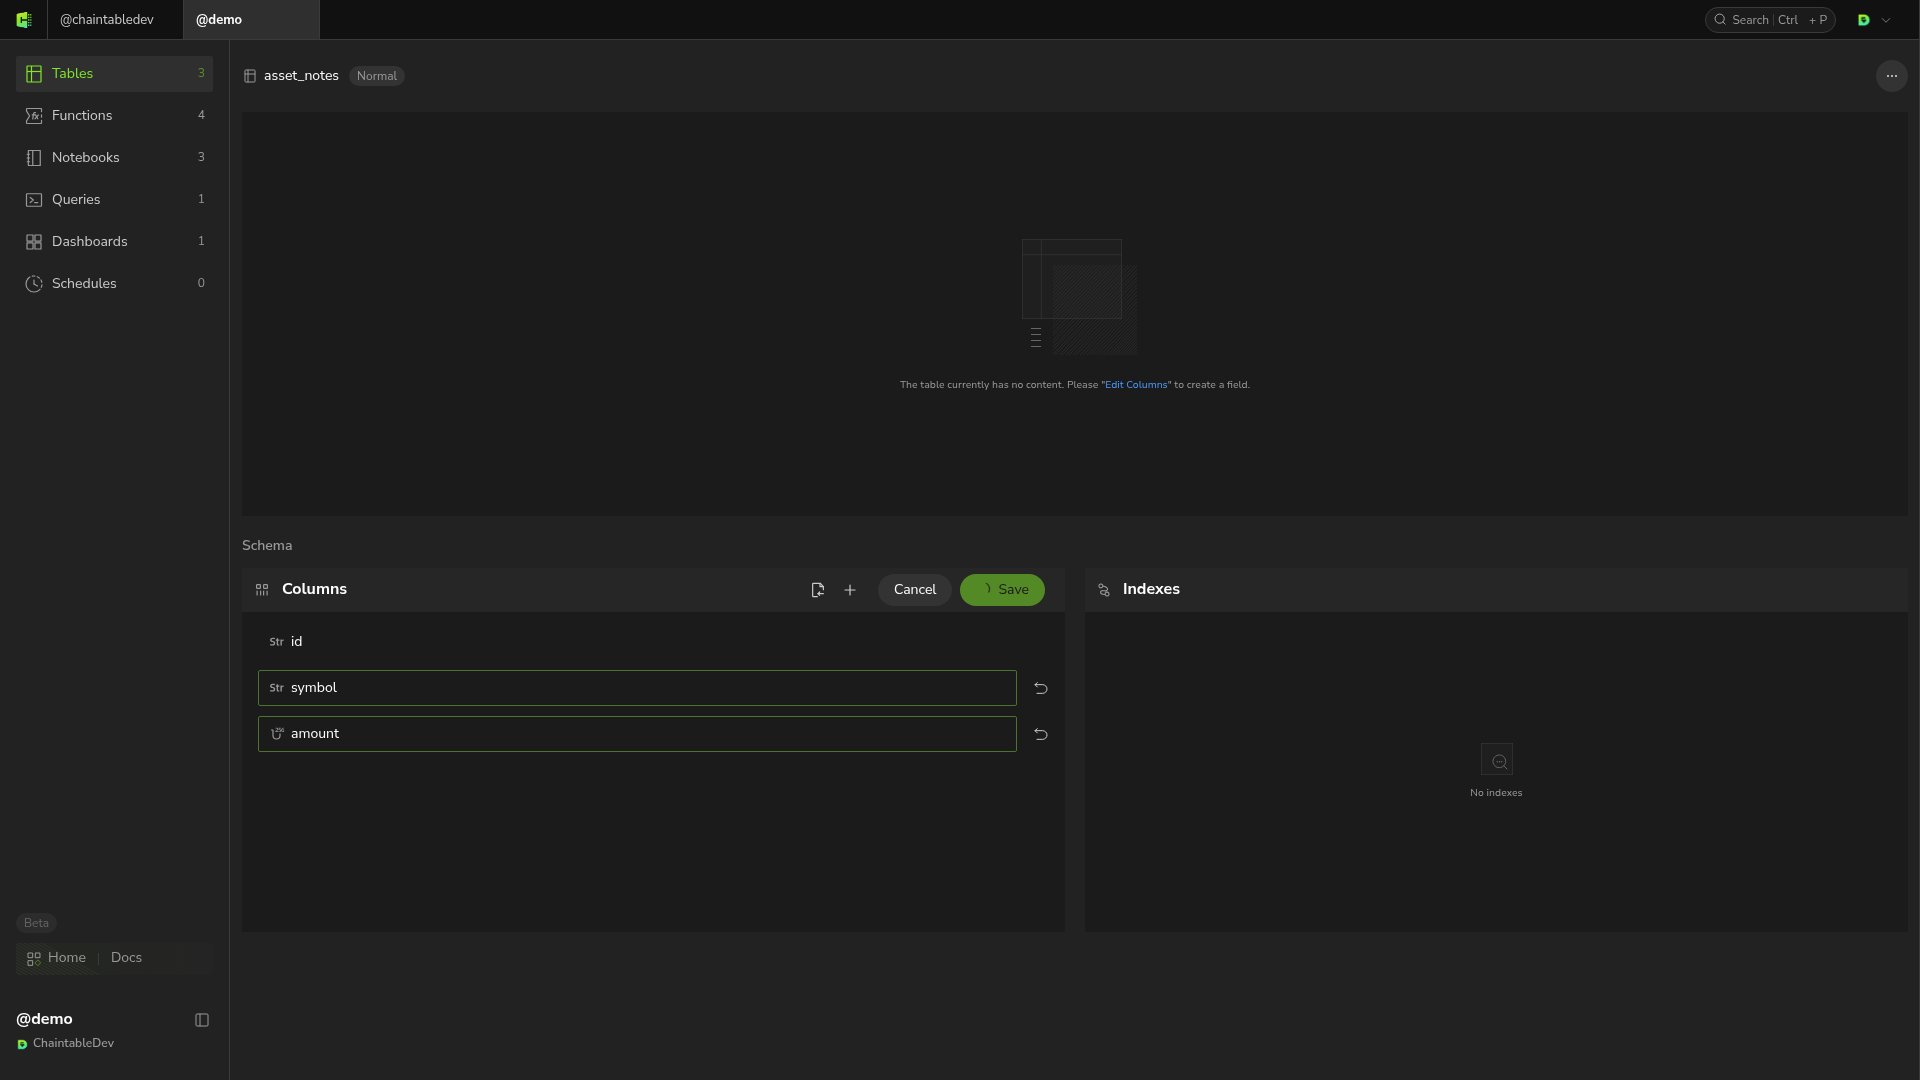
Create tables in your Space by choosing a data model and defining its fields. This example creates a Normal Table named `asset_notes` in `demo` to store asset information and amounts.
Spaces currently offer only Public visibility, so the tables and data they hold are visible to other users. See [Account management](/guides/accounts/management).
## Choose a table type
In **Tables**, click **+** in the upper right and select **Table Type** in **New Table**.
| Type | When to use it |
| --------------- | ------------------------------------------------------------- |
| **Normal** | Store and update records by a business primary key |
| **Block Event** | Store individual on-chain events, such as transfers |
| **Block State** | Store object state across blocks, such as pool reserves |
| **Time** | Store values that change over wall-clock time, such as prices |
Block tables also require a chain. See [How tables work](/guides/tables/model) for the differences.
## Create and define fields
1. Select **Normal**, enter `asset_notes` in **Table name**, and optionally add a **Description**.
2. Click **Save and open**.
3. Click **Edit** under **Schema → Columns**. Keep the default `id: STRING`.
4. Click **+** in the field area to add each field below, clicking **Confirm** for each.
5. Click **Save** to save the schema.
| Field | Type | Content |
| -------- | --------- | ---------------------------------- |
| `id` | `STRING` | Record primary key, such as `usdc` |
| `symbol` | `STRING` | Token symbol, such as `USDC` |
| `amount` | `UINT256` | Raw integer amount |
 The full table ID is `demo.asset_notes`. Block tables include a chain suffix, such as `demo.pool_reserves.eth`. A name differs from a full ID; use the full ID in SDK calls and SQL.
## Default block-table and time-table fields
Block tables include `id`, `block_height`, `block_id`, and `block_timestamp`. Choose the primary-key type for your data: transfer records can retain their event IDs, while pool state can use `ADDRESS` for `id`. Set the [start height](/guides/tables/advanced#set-the-start-height) after saving the schema and before processing the first block.
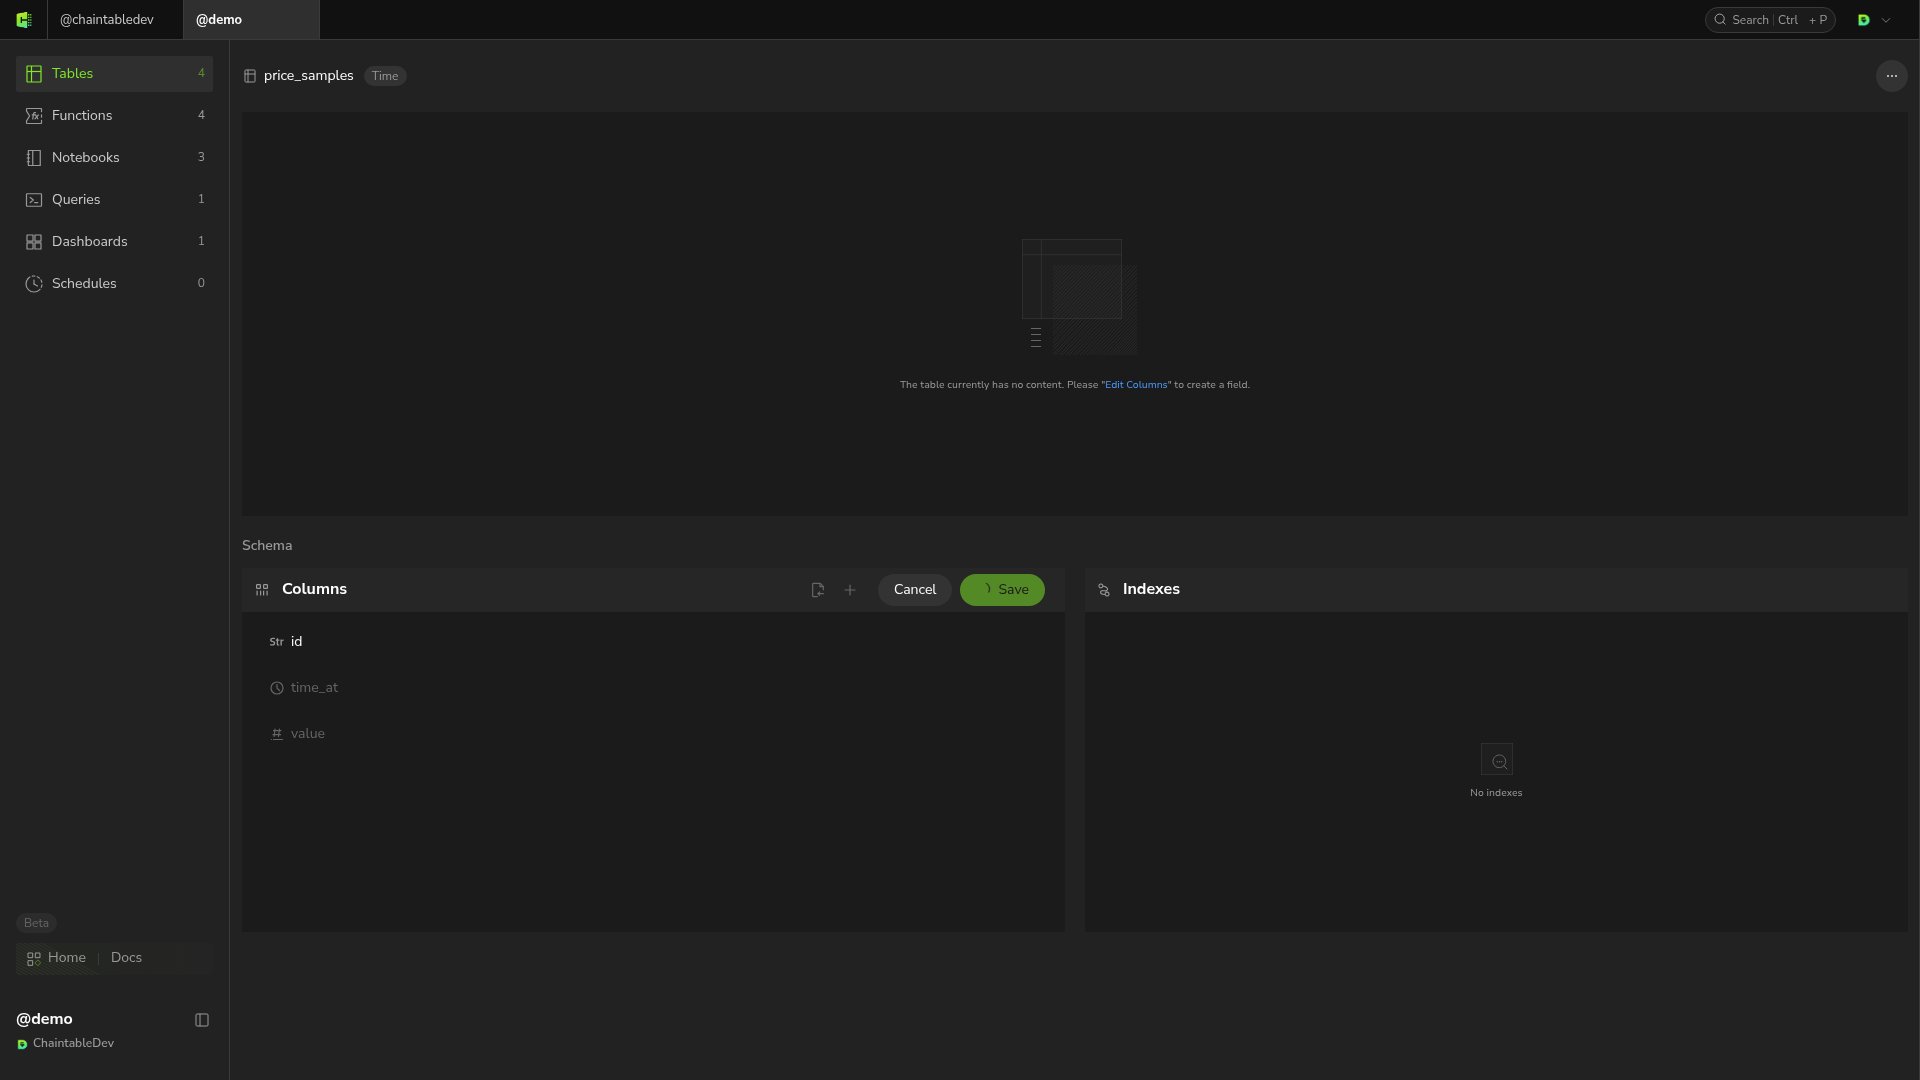
Time Tables use `id`, `time_at`, and `value`. For example, create a **Time** table named `price_samples`, click **Columns → Edit** to inspect the default fields, then **Save** to initialize the schema.
The full table ID is `demo.asset_notes`. Block tables include a chain suffix, such as `demo.pool_reserves.eth`. A name differs from a full ID; use the full ID in SDK calls and SQL.
## Default block-table and time-table fields
Block tables include `id`, `block_height`, `block_id`, and `block_timestamp`. Choose the primary-key type for your data: transfer records can retain their event IDs, while pool state can use `ADDRESS` for `id`. Set the [start height](/guides/tables/advanced#set-the-start-height) after saving the schema and before processing the first block.
Time Tables use `id`, `time_at`, and `value`. For example, create a **Time** table named `price_samples`, click **Columns → Edit** to inspect the default fields, then **Save** to initialize the schema.
 ## Configure indexes
Under **Schema → Indexes**, click **Edit**, then **+**. Select the field to index and click **Save**. For example, add a `symbol` index to `asset_notes`.
## Configure indexes
Under **Schema → Indexes**, click **Edit**, then **+**. Select the field to index and click **Save**. For example, add a `symbol` index to `asset_notes`.
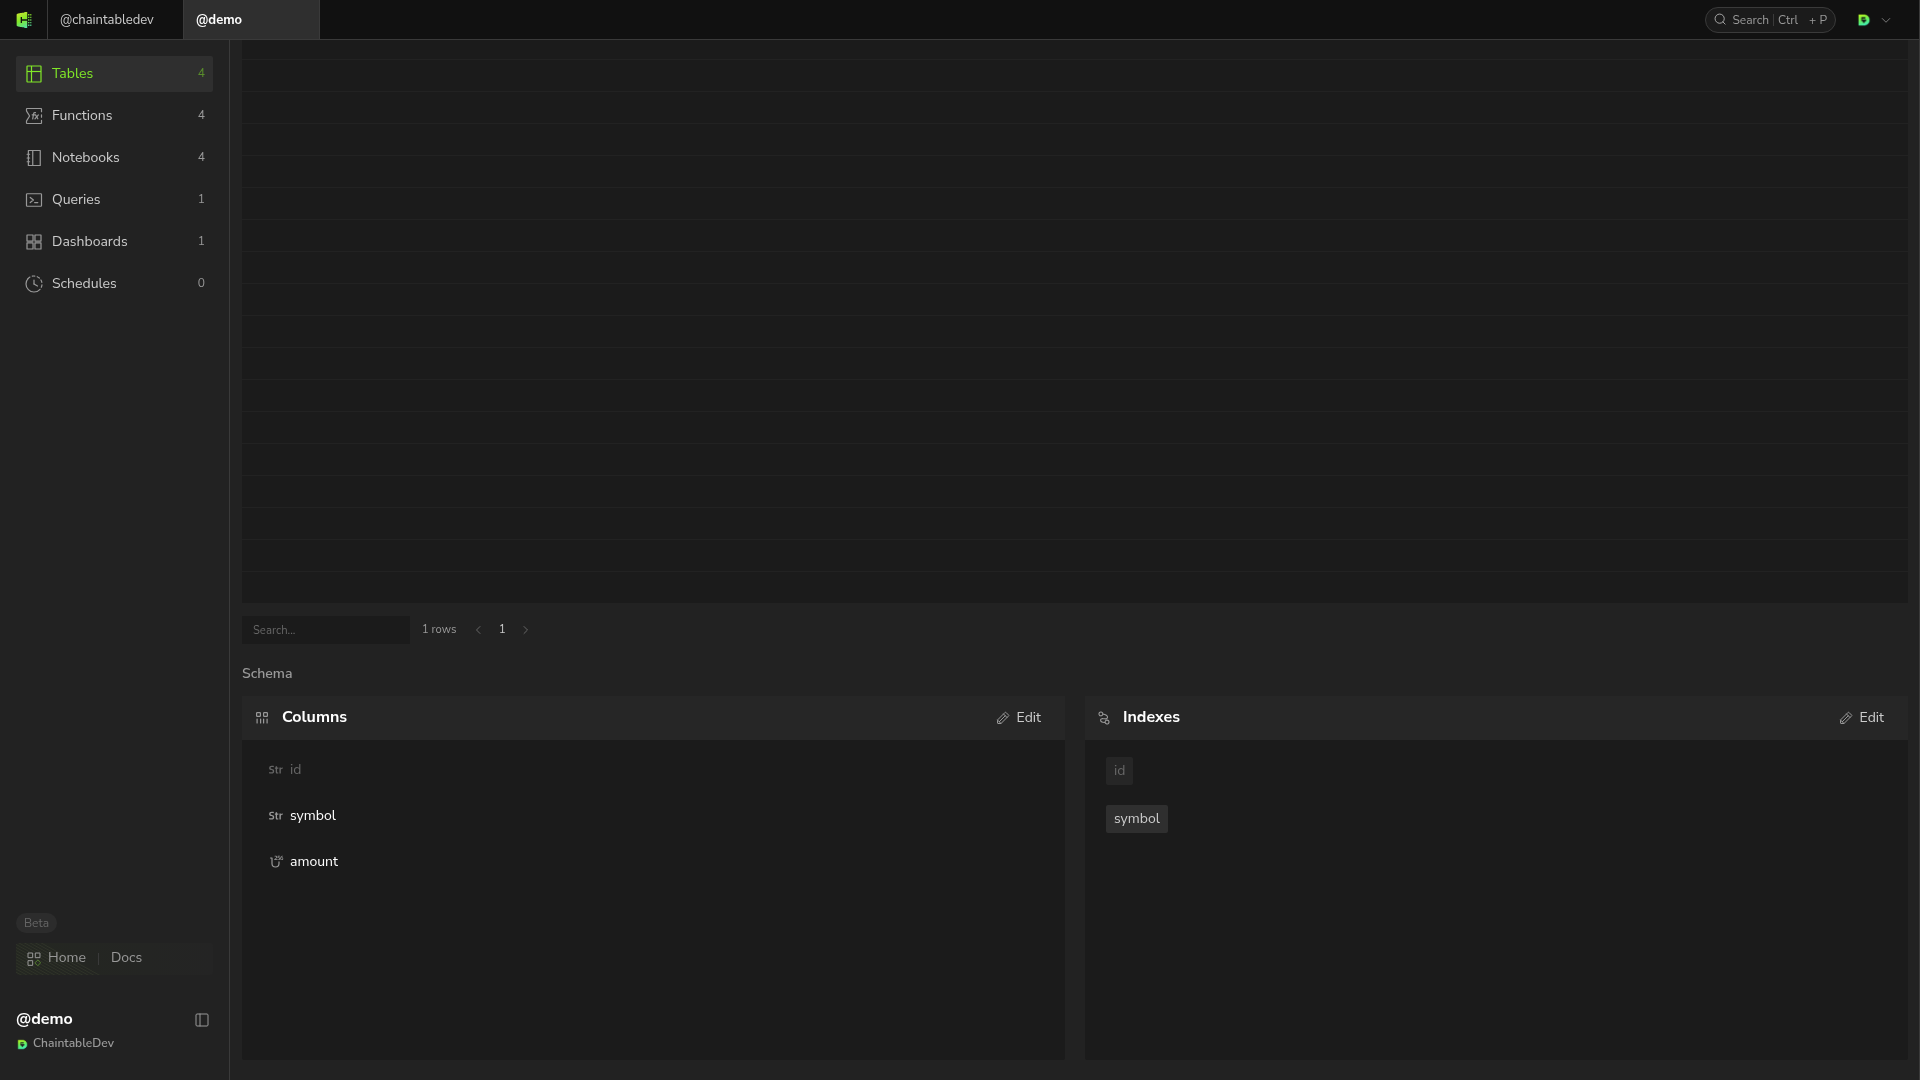 Choose indexes for common filters and keep existing system indexes.
## Inspect and manage a table
Reopen the table from your Space's **Tables** list to inspect its type, fields, indexes, records, and update activity. Block-table **Overview** also shows coverage. Block and time tables provide different data views under **Subtables**.
The **…** menu at the top right offers **Truncate** and **Delete**. Truncate removes all records; Delete removes the table. Both require confirmation. Check resources that depend on the table before proceeding.
Choose indexes for common filters and keep existing system indexes.
## Inspect and manage a table
Reopen the table from your Space's **Tables** list to inspect its type, fields, indexes, records, and update activity. Block-table **Overview** also shows coverage. Block and time tables provide different data views under **Subtables**.
The **…** menu at the top right offers **Truncate** and **Delete**. Truncate removes all records; Delete removes the table. Both require confirmation. Check resources that depend on the table before proceeding.