

Create a timed schedule
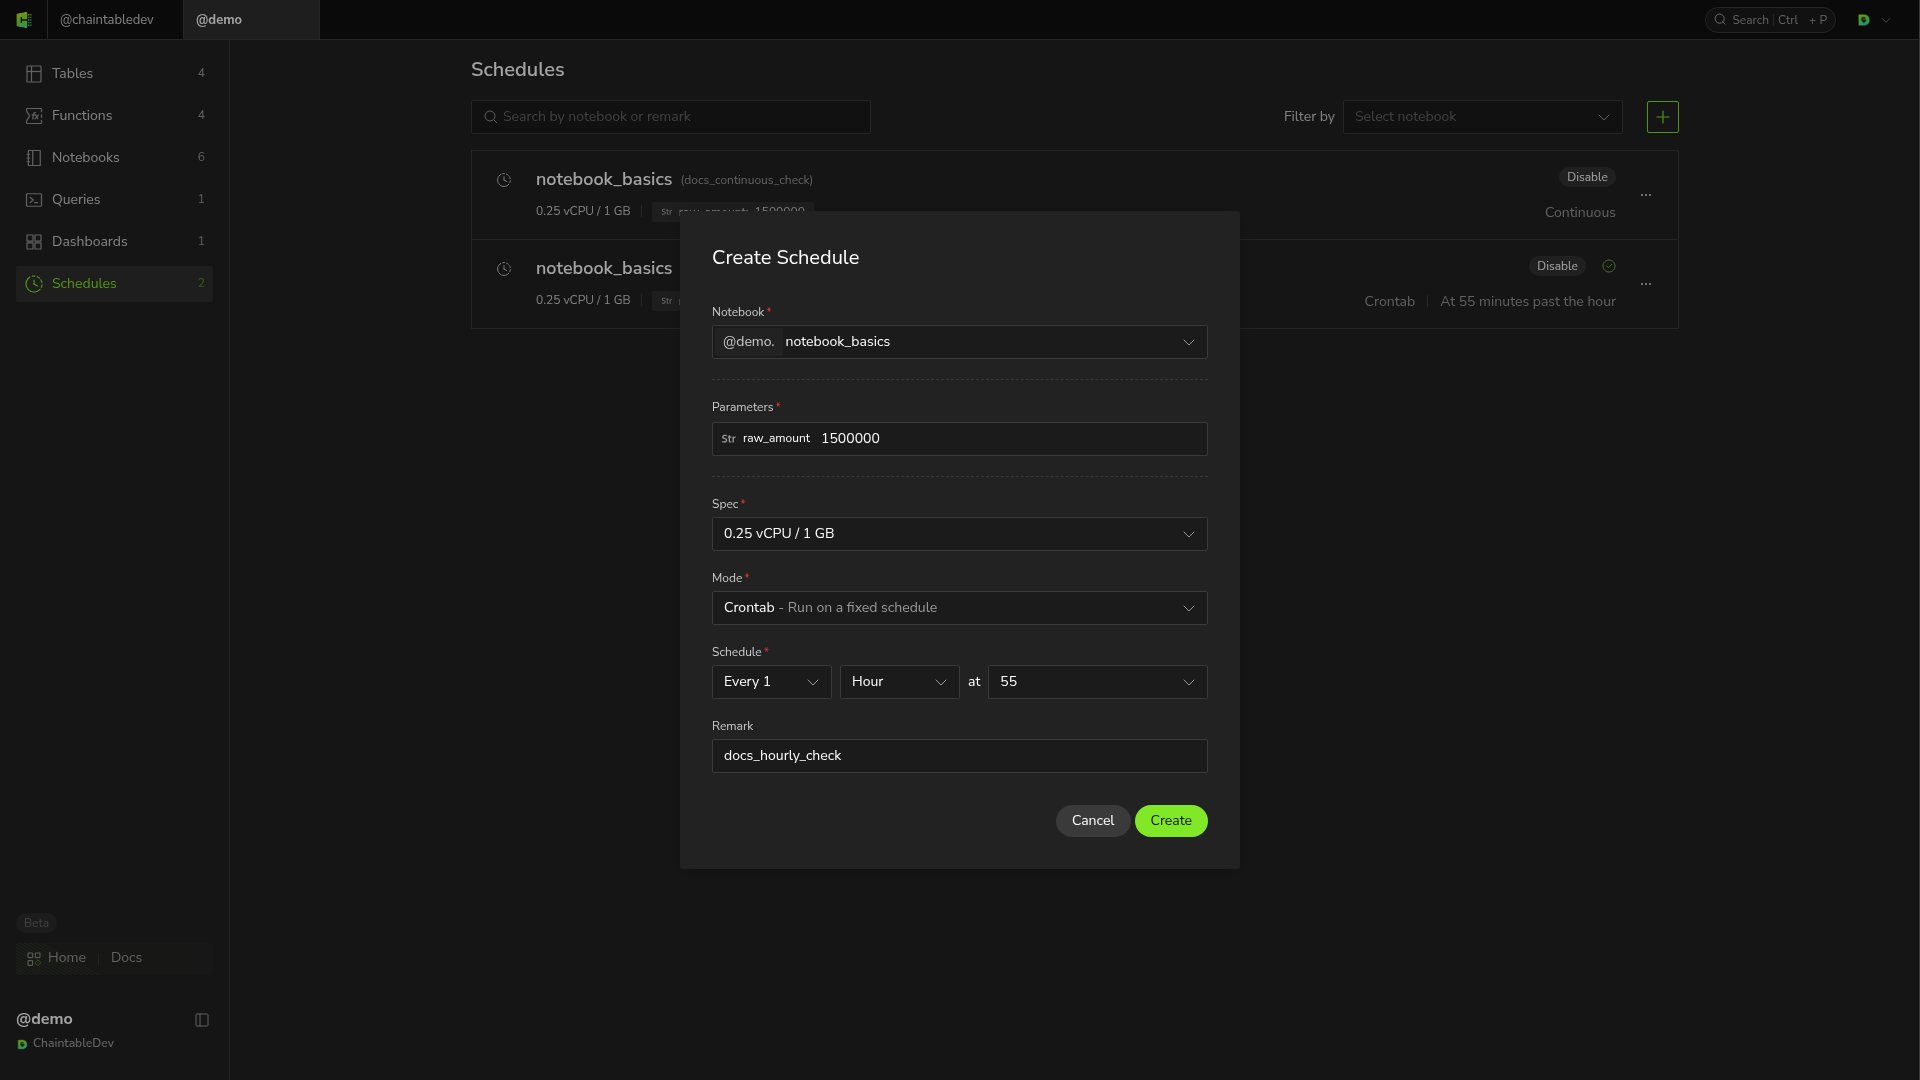
- Open the Notebook’s Space, select Schedules in the sidebar, and click + in the upper right.
- Search for and select the script under Notebook.
- Fill in Parameters and select Spec.
- Select Crontab - Run on a fixed schedule under Mode, then set the frequency and time.
- Optionally describe its purpose in Remark, then click Create.
Create a continuous schedule
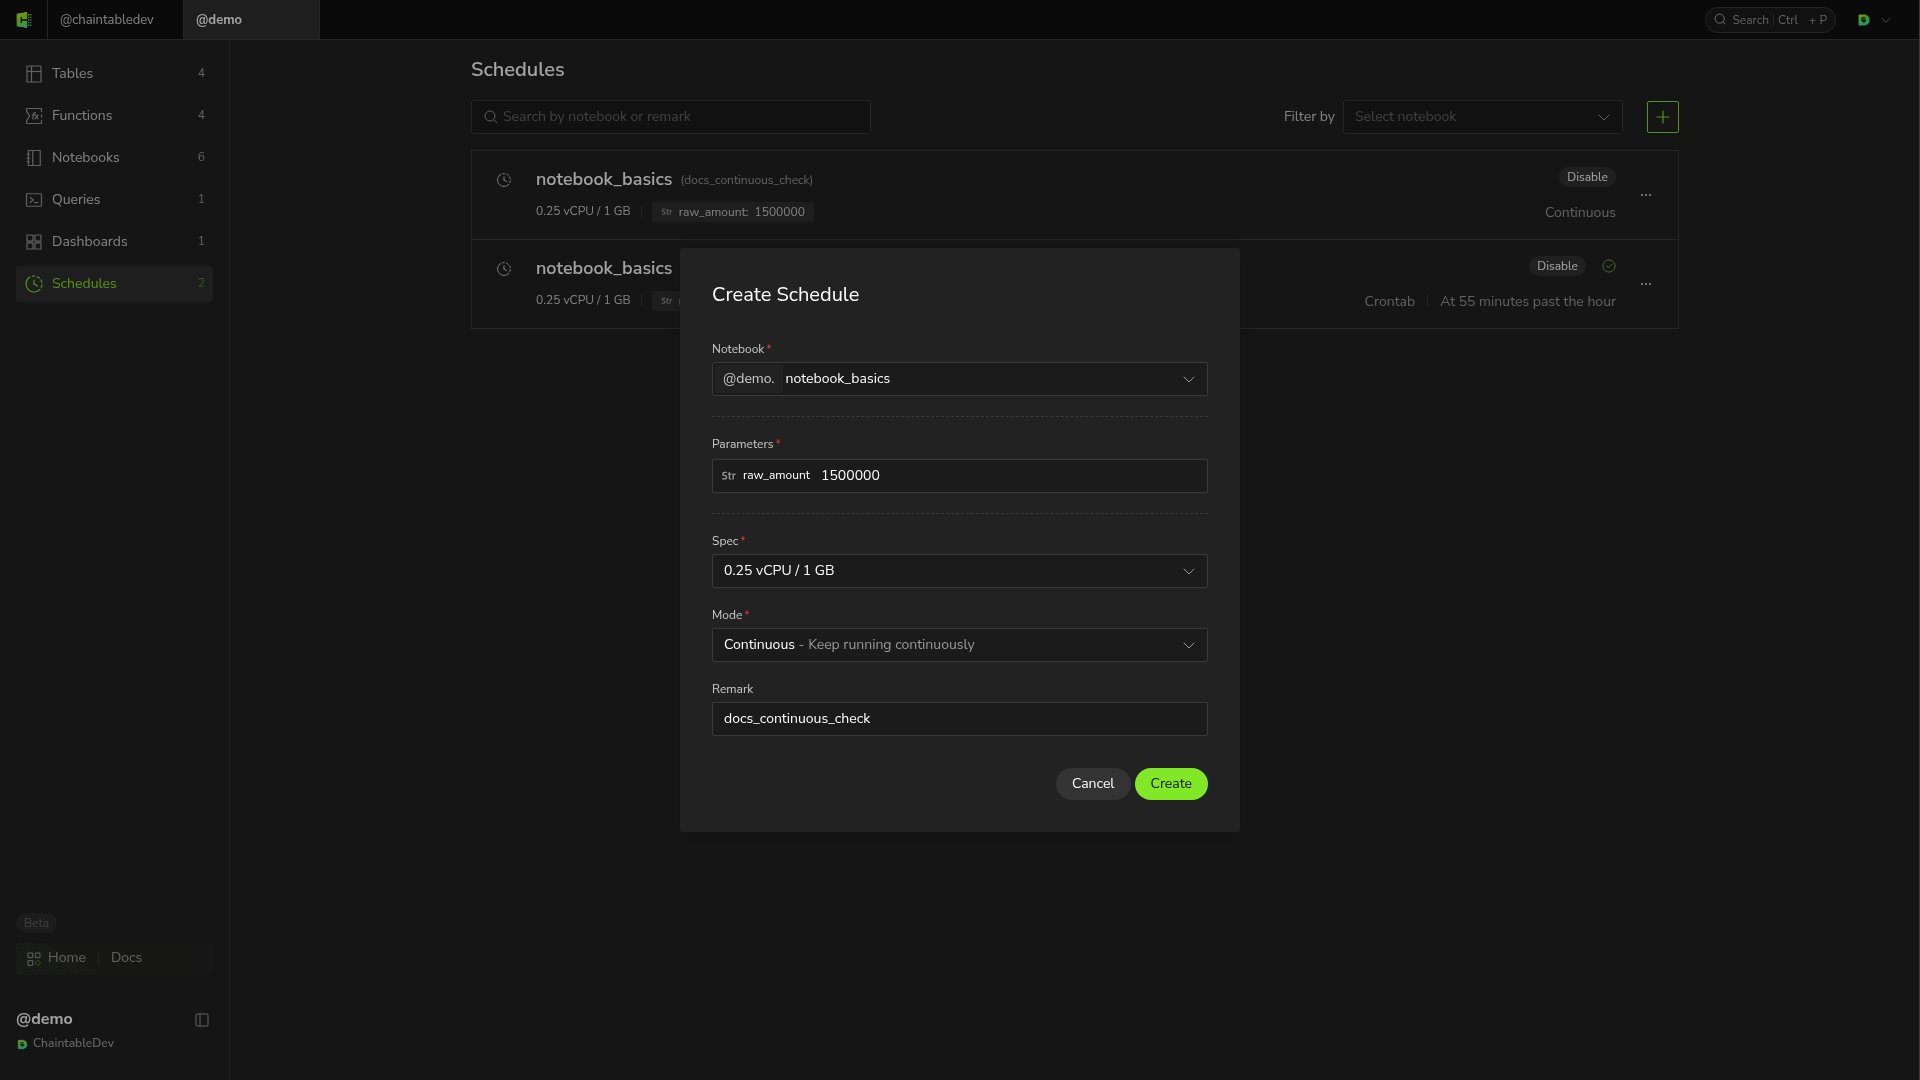
ForPipeline.update() or a long-running subscription, select Continuous - Keep running continuously under Mode, set parameters and resources, and click Create.
Check results
- Check the configuration and enabled status in Schedules.
- Open Instances from the account menu and find the Notebook’s instance at the relevant time.
- Open the instance, check the schedule name under Launched, Arguments, and Start Time, then inspect Status and Logs.
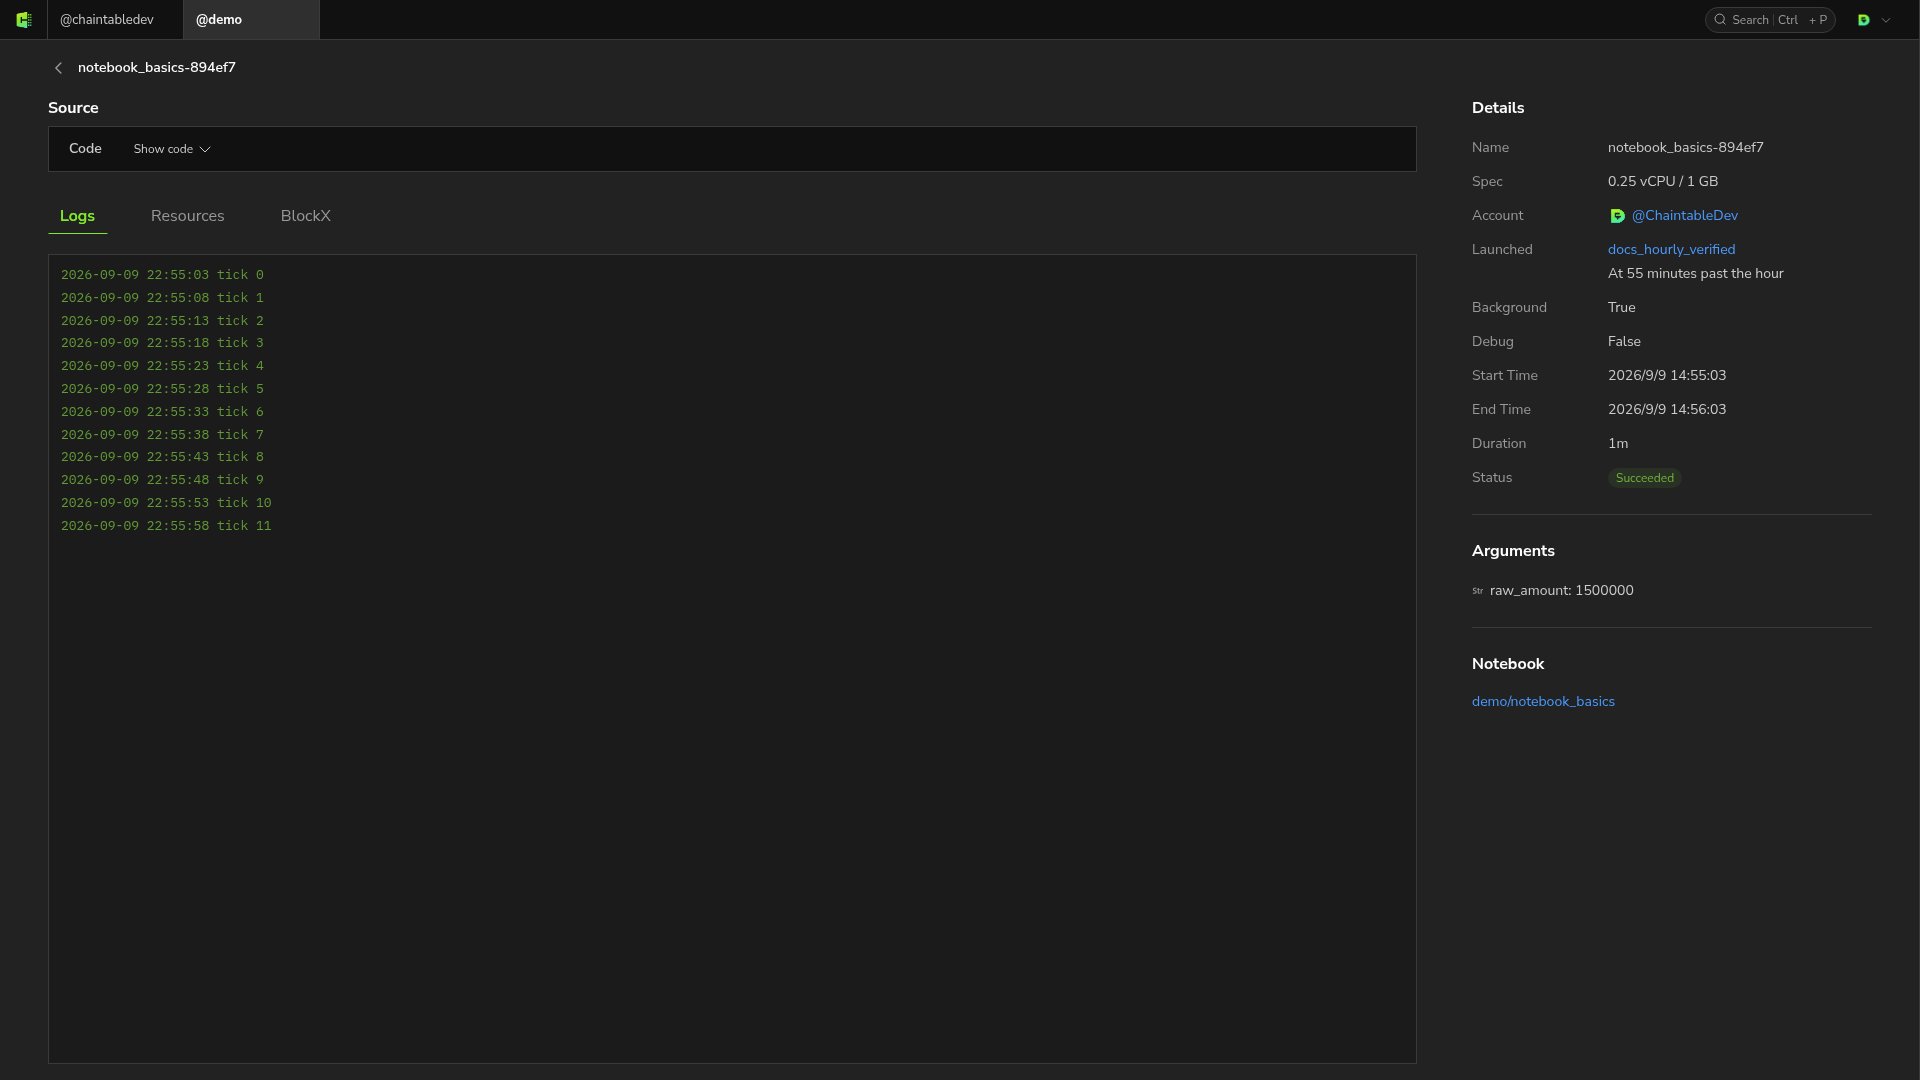
tick 0 through tick 11. Use the same steps to inspect logs from ended Continuous instances.
Edit and stop
Open … at the right of a schedule row:
To update a running Continuous schedule, Disable it and confirm the instance ends, save the code and configuration, then Enable it so the new instance uses the changes. Disabling Crontab does not cancel an instance that has already started; use Cancel in instance details if needed.